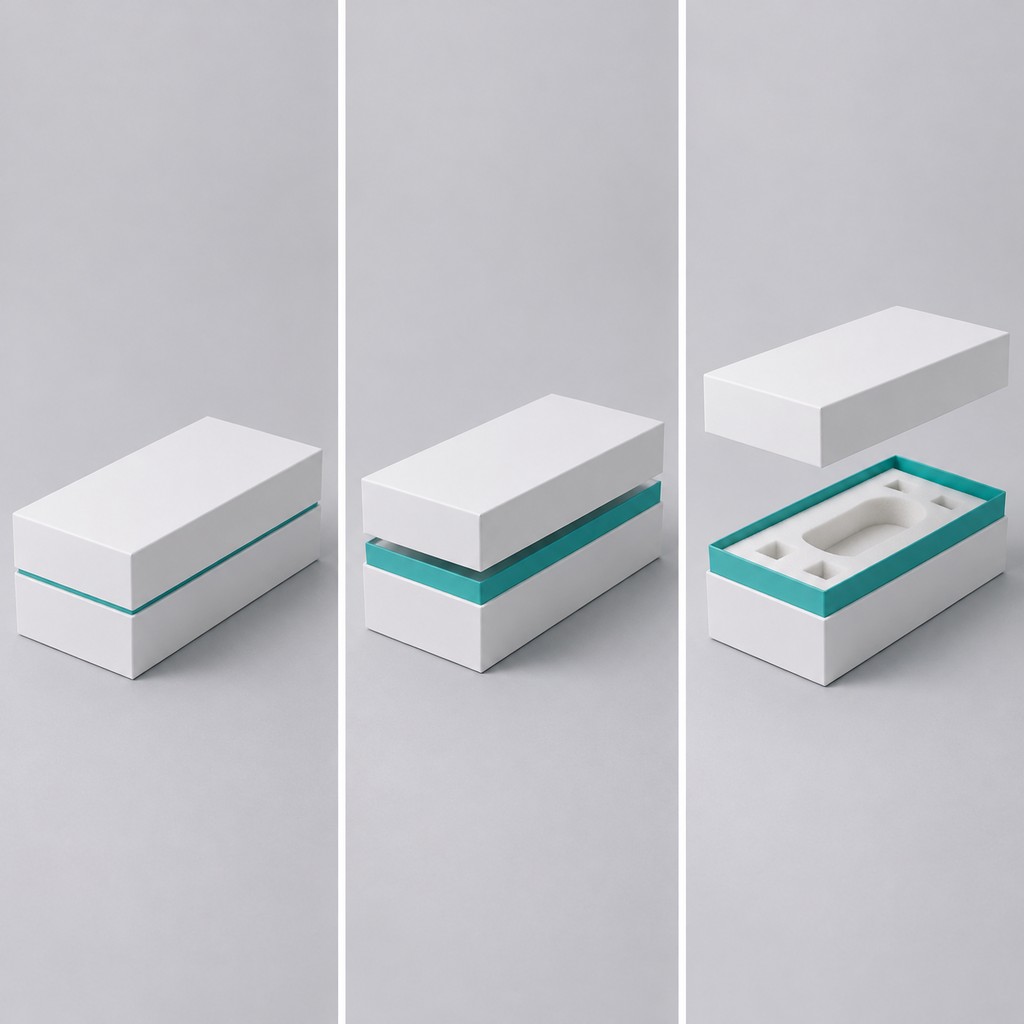
An exposed rim box shows its rim band as a narrow stripe when it is shut. On this one the stripe is 2.6 mm of teal between a white cover and a white base, and it is not decoration: it is the top of a paper band glued inside the base wall, standing above the mouth, with the cover resting just above it.
What an Exposed Rim Actually Is
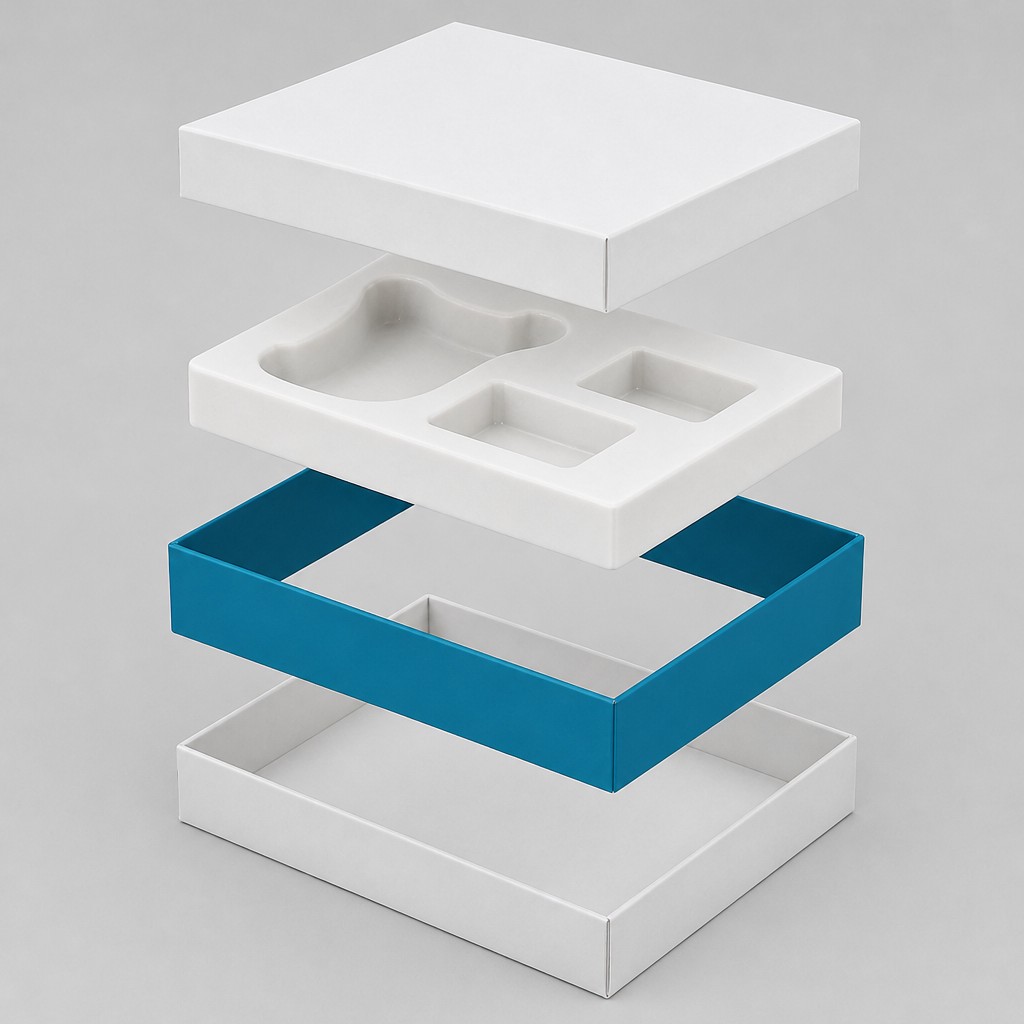
The rim is a strip of paper, not a board ring. It has no bottom and no top panel. It is glued flat against the inside face of the base walls and runs about 2.6 mm above the mouth, forming the wall of the loading cavity.
Because it is glued inside and stands up, three things follow at once: the cavity wall can be a different colour from the outside, the colour has a paper edge rather than a printed edge, and the top of that band is visible from outside as a stripe. One piece, three effects.
Why the Band Is Glued Inside the Base Wall
Glue it outside and it becomes a wrap, and a wrap needs an overlap or a seam to close, which is a bump on one corner. Glue it inside and the overlap disappears into the base’s own wall, and the band becomes structural: it does the work of lining the cavity at the same time.
It also means the base carries the load and the band adds nothing to the footprint. The lower part of the band is backed by the base wall along its whole height, so the only free section is the few millimetres standing above the mouth. That is why the band does not bow outwards once a denture is dropped in.
| Piece | What it is | What it does |
|---|---|---|
| Base | white tray with a floor and four walls | carries the weight; 41% of the closed height |
| Rim band | teal paper strip, no floor, glued inside the base walls | forms the cavity wall; shows as a 2.6 mm stripe at the joint |
| Cover | white cap with a top panel and no bottom board | closes the top; 55%, skirt about 3.1 cm |
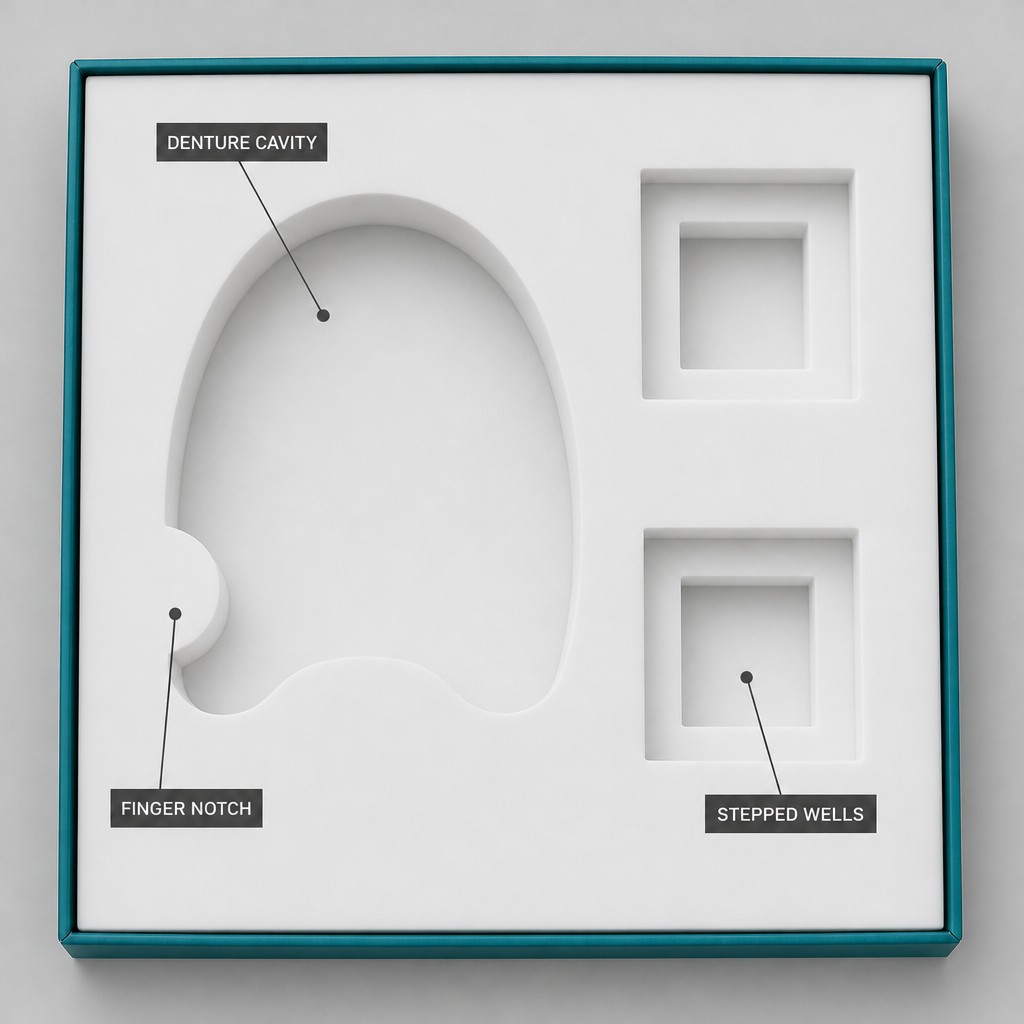
| Insert | white closed-cell EVA, three cavities | holds the product; usable depth about 41 mm |
2.6 mm: Enough to Read, Not Enough to Catch
A stripe has to be wide enough to register as a colour and narrow enough that the eye reads it as an edge rather than a part. Two and a half millimetres sits in that window: at arm’s length it is a line, and up close it is a machined band with visible paper thickness.
Go wider and it reads as a second box; go narrower and the two joint lines collapse into one blur. It also has to be consistent, which is the harder half. The stripe is the gap between two independent pieces, so its width varies with how the cover sits, and a couple of tenths of a millimetre is visible on a 15 cm edge.
Two Joint Lines Instead of One
A hidden rim closes with one line, where the skirt meets the base. An exposed rim closes with two: the cover’s lower edge, then the band’s upper edge. Between them is the stripe. That is the whole visual difference between the two builds, and it decides which one you want.
Two lines are more work at the joint. Each has to be straight, and they have to be parallel, because the eye compares them across the whole 15 cm side. One line only has to be straight.
What Changes When You Hide the Rim
Push the band down inside the base until the cover can pass over it, and the stripe disappears. The box then closes as two colour blocks with one joint line, and the band becomes a pure cavity lining.
Nothing else changes: same four pieces, same insert, same interior. That is worth knowing when a buyer asks for “the same box without the stripe”, because it is a change of band height, not a new construction.
Where a Flat Tray Beats a Deep Box
This build is a flat tray: with the insert in place the usable depth is about 41 mm. That suits a denture, a clear aligner, a retainer, a scaler and its tips, a small bottle of cleaning tablets. It does not suit a tall rinse bottle, and a taller cover would not fix that, because the cover carries no load.
When the product is small and the brand matters, the flat tray wins: the box is wide enough to show a printed cover, the insert holds the product still, and the stripe gives the joint a reason to be looked at.
Four Things to Send Before the Dieline
Send the product outline with its tallest point, the layout you want inside (one cavity, three, or none), the colour for the band, and the artwork if the cover is printed. The first two fix the size and the insert; the third decides whether the box is two-tone or three-tone; the fourth only affects the cover face.
If the device is close to 41 mm, send the actual device height rather than a rounded figure, because the insert thickness eats into it. The box itself is on the dental packaging box page, and the rest of the range sits under lid and base boxes.